GlassFish creates a simple tester for every deployed WS
which you can reach via the previously mentioned Web Service pages of every
WS. Just click on the button on
this page (cf. Figure 3.5) and test the web method you are interested in. For
WSs with web method requests of simple types this works pretty
well; for example, for the LanguageIdentifier
WS just enter some natural language text string as a request to
the getLanguage web method and you’ll get the detected
language as a result. However, for WSs with more complex
request objects entering an appropriate request is not feasible with this
tester. Therefore we use a dedicated WS tester: soapUI. You
should already have your own copy of soapUI running – otherwise you may have a
look at the instructions in section 3.1.2 on how to do so.
In the soapUI default workspace we first create new projects for this and the following tutorials. We will create separate projects per language and location that shall be supported, i.e., the languages and locations for which we have deployed WSs previously. Additionally we create one project for the system-wide WSs.
In order to create a new soapUI project, go to → (
Ctrl+N). In the New soapUI Project dialog enter an
arbitrary project name which helps you later to distinguish the different
projects and WSs that are used in this project. We will use
“QALL-ME Framework Demo Tutorial – System-Wide Components”, “QALL-ME Framework
Demo Tutorial – German Language Components”, “QALL-ME Framework Demo Tutorial –
Spanish Location Components” and similar names here. We enter the Initial WSDL manually in the form of a URL which we
get from the application server. It doesn’t matter of which WS
you use the WSDL URL here; it will be simply
the first imported WS description in your project. You should
just make sure that the WSDL URL you choose
actually fits to the project you are just creating. The other WS descriptions follow in a minute. In GlassFish choose an arbitrary
WS that shall belong to your new project and go to its Web
Service page (cf. Figure 3.5). When you click the View WSDL link, you
get a new browser window with the WSDL of the deployed
WS instance. We are only interested in the URL
of the document which you can find in your webbrowser’s location bar. Copy this
URL into the Initial WSDL field in soapUI.
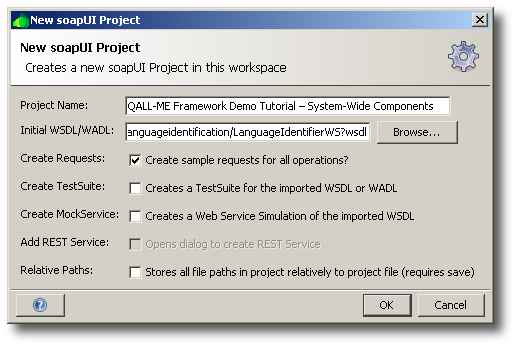
Then make sure the Create Requests box is checked (cf.
Figure 3.6). This creates
request skeletons for every web method of the WS which we are currently
importing (i.e., the LanguageIdentifier in the depicted
example) – that’s just what we have missed in the simple GlassFish tester above.
Click to create the new project and to import your
first WS description.
Figure 3.6. The New soapUI Project dialog filled in with the
LanguageIdentifier WS’s WSDL URL as the first WS
description to import.
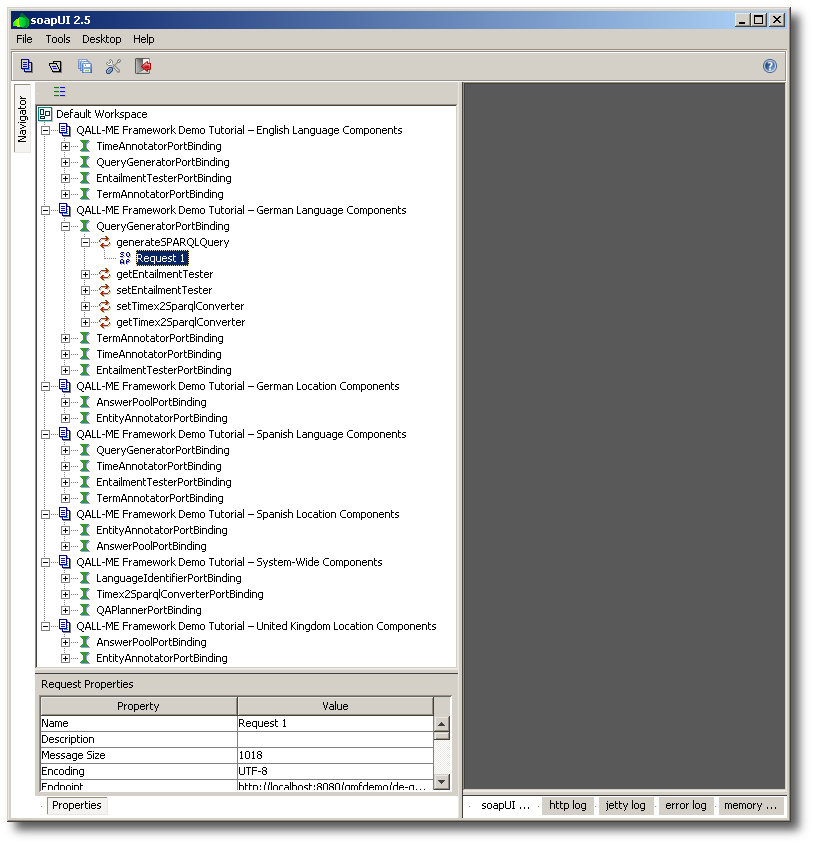
The soapUI default workspace should now contain a first project with the
name you have specified. This project should contain a port binding for the
WS you have chosen to import, e.g., a
LanguageIdentifierPortBinding. Before doing anything
with this, let’s first create all remaining projects and import all remaining
WS descriptions. Project creation has been described above;
importing further WSs into your new projects is easily done by
right-clicking on the project and choosing (Ctrl+U) from the pop-up menu. The Add
WSDL dialog is pretty similar to the New soapUI
Project dialog. Again copy the WSDL URL of one of your WSs into the WSDL
Location field, make sure Create Requests is
checked and click . The second WS
description has just been imported. Repeat this import for all remaining
WSs now.
Eventually your soapUI workspace should look similar to the one in Figure 3.7.
We could now start testing every single WS independently of each other and it would work. But let us put this aside for the next tutorial in 3.3: “Playing with the Demo Web Services” and first initialize and demonstrate the demo QA system as a whole.


