Table of Contents
In this section you will find a collection of tutorials that’ll hopefully get you started with the QALL-ME Framework. The tutorials are organized as step-by-step guides which should be easy to follow. Although it should be possible for you to follow these guides without further thinking about what you are doing, this is not recommended. Rather you should try to understand every step; we cannot foresee all the specifics of the different working environments out there, so be prepared to having to solve certain issues yourself. If you should get stuck, then you may also ask on the project mailing list for help. However, before doing that you should really make sure you have read the prerequisites section 2.2 which also provides references to further documentation.
The tutorials assume you are developing in Java and you are using tools from the Java world. Because of this, we assume you have a working JDK on your development machine (at least in version 5) that you can also use from the command line. See the prerequisites section 2.2 for information on where to get the JDK from. Most people should be able to easily follow the first two tutorials in sections 3.1 and 3.2. For the remaining tutorials we assume that the reader is at least a little familiar with web service standards, related technologies and their interconnections with the Java world.
For most tools that we are using, there are alternatives out there that you may use instead. Please note, however, that our resources are limited and we cannot provide support for alternative setups. Maybe there are people on the project mailing list, though, who can help you.
This section gives you a step-by-step guide for the installation of required and relevant software which is used to develop QA systems with the QALL-ME Framework. It is mainly intended for people who just want to quickly try out the framework without being too familiar with the technologies behind it. Most people who already have web service development experience with Java likely already have a suitable setup for the development with the QALL-ME Framework and can therefore skip this section.
The QALL-ME Framework is a collection of components which are implemented as web services (WSs). To run these WSs or rather to make them available, we have to deploy them on an application server. As we are using Java WSs, we need a Java EE application server. Our prebuilt WSs specifically need a Java EE 5 compatible application server with JAX-WS 2.0 support. In this tutorial we install the free GlassFish Application Server. Other Java EE 5 certified application servers are among others Apache Geronimo and the JBoss Application Server.
First go to the download
section of GlassFish and fetch the latest final release. In this tutorial
we are using version 2.1 Final (also known as v2.1 b60e Promoted Build); any
newer and most older versions should work as well, though. We are downloading
one of the binary builds for the Windows platform:
glassfish-installer-v2.1-b60e-windows.jar
Note
In the following we are only installing GlassFish locally under Windows. This should suffice for development and basic testing. However, for production purposes we recommend you to install GlassFish on a dedicated server machine instead.
Installing GlassFish on any other platform for development and testing should be pretty similar.
When your downlad is finished, run the downloaded JAR
file: sometimes this can be done by double clicking on it; if that doesn’t work,
open a command line interpreter (often called a “shell” or simply a “terminal”)
and run java -Xmx256m -jar
glassfish-installer-v2.1-b60e-windows.jar to extract GlassFish. In
the license dialog read and accept the license agreement to go on. There should
be a new folder called glassfish now. You can move this
folder anywhere you like before proceeding to the next step which performs the
actual configuration of GlassFish.
Now run the setup Ant script with lib\ant\bin\ant -f
setup.xml. On Unix-like systems you may first have to set execute
permissions for the script (e.g., chmod -R u+x
lib/ant/bin/). After these steps your application server should be
ready. You can test it by first starting it with bin\asadmin
start-domain domain1 from the installation directory and then going
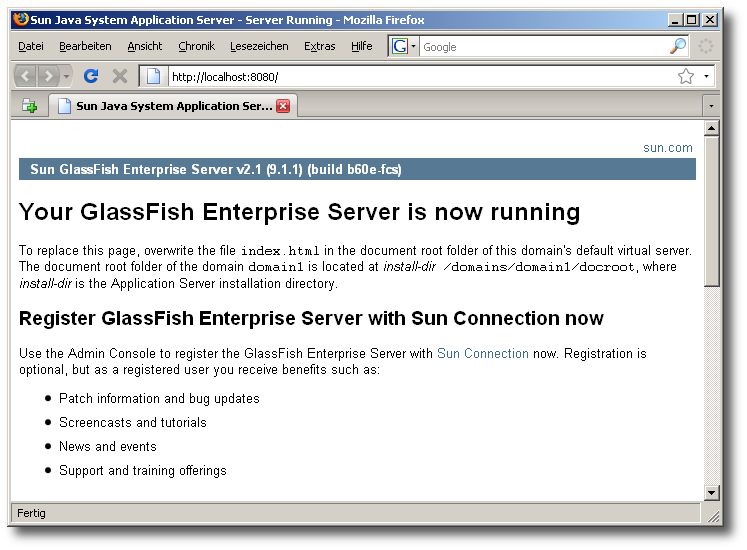
to http://localhost:8080/ with your web browser. If you see something
like “Your GlassFish Enterprise Server is now running” (Figure 3.1), then
all went well.
To stop your GlassFish server run the following command:
bin\asadmin stop-domain domain1. You can always restart it
later with bin\asadmin start-domain domain1. For your
convencience you may want to create two scripts or batch files for easy starting
and stopping your server later.
Check out the GlassFish
Quick Start Guide for general information and further first steps with
your new application server. You may be especially interested in the GlassFish
Administration Console that you can reach via http://localhost:4848/;
use the default user name “admin” with password “adminadmin” to log in.
One of the big advantages of web services (WSs) is that they can be used with virtually any programming language – no matter in which language the concrete component implementations have been written. However, always writing code for testing WSs is a bit annoying. A much easier way for simple testing is to use a dedicated test environment for WSs. soapUI is a free tool which provides such an environment; we are going to install it in this tutorial section.
Head over to soapUI’s website and download the free
version[3] or directly go to their SourceForge.net
download page and fetch the latest version of soapUI there. We are
installing version 2.5 using the Windows installer here:
soapUI-2.5-installer.exe
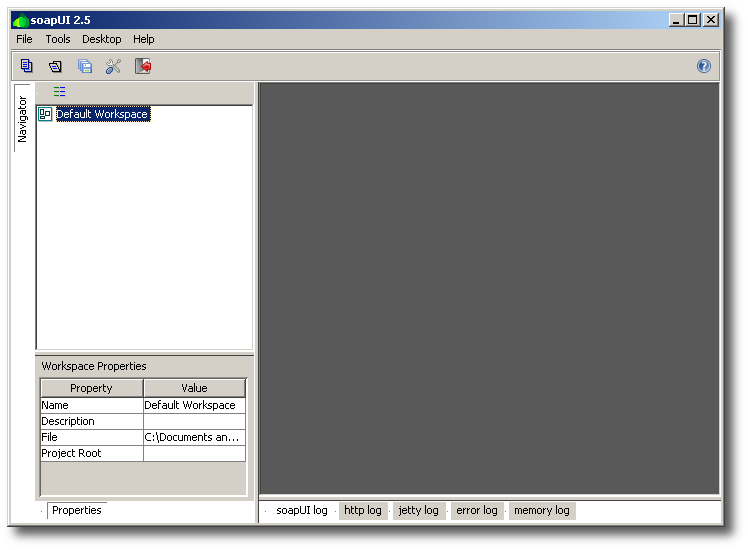
After the installation you should be able to run your new soapUI. The program should present you an empty workspace, like the one in Figure 3.2.
For the moment you can close the program again. In section 3.2: “Getting Started with a First Demo” we are going to use our fresh soapUI installation for the first time.
You are a Java developer and you probably have built yourself a nice working environment including your favorite source code editor and maybe other tools. Maybe you are even using an IDE like NetBeans or Eclipse. No matter what you use: if you are happy with what you have and if you don’t miss anything, then you can probably skip this section.
For going through the upcoming tutorials we have used the Eclipse IDE. That’s just the way we did it. There are certainly other ways that may even be better. However, as said before, we cannot try out all of them, so we have focussed on Eclipse. If you are already using Eclipse or if you’d like to closely follow the upcoming tutorials with your own copy of Eclipse, then we recommend you to use the Eclipse distribution “for Java EE Developers” that you may find in the Eclipse Downloads section. The Eclipse IDE for Java EE Developers includes many useful additions to the default Java Development Tools (JDT) and ships the Web Tools Platform (WTP) by default. This additional functionality is of great utility when working with WSDL documents or XML Schema files for example. Just grab it and give it a try!
Tip
If you are just trying out the QALL-ME Framework, then you may also skip this section. It may only become relevant if you plan to seriously develop your own QA system using the framework.
When working with web services (WSs) in Java it makes sense to use an existing API for that. There are two major free APIs: Apache Axis2 and the JAX-WS reference implementation by the GlassFish community. In the QALL-ME Framework and in the following tutorials we are using the latter. However, as always, you may freely decide to use anything else and it should work, too: in the QALL-ME project (cf. section 2.4), for example, we are successfully using Axis2 implementations of framework component WSs side-by-side with implementations which are strictly based on the JAX-WS 2.0 API. Be aware, though, that the QALL-ME Framework code may not always run with your own Axis2 installation without modifications!
If you have installed GlassFish as your application server as described previously in section 3.1.1, then you already have the JAX-WS API and runtime on your machine. However, the version that ships with GlassFish often is not the latest. In the course of the QALL-ME project we have experienced problems due to JAX-WS bugs several times which could be resolved by using newer versions of the implementation. Therefore we recommend you to get an extra copy of the latest version of the JAX-WS reference implementation and always use that.
To fetch the latest version of JAX-WS head over to the
JAX-WS
project page and watch out for the downloads section. At the time of
writing of this tutorial the latest version was 2.1.5. An installation should
not be necessary; simply unpack the downloaded JAR file by
double-clicking on it or running the command java -jar
JAXWS2.1.5-20081030.jar in a shell – there should be a newly created
directory called jaxws-ri now which contains the
API package; the most interesting files will probably be the
JAR libraries in the lib subdirectory.
And that’s all for the moment. In 3.3: “Playing with the Demo Web Services” we will use the new installation for the first time.
Tip
If you are just trying out the QALL-ME Framework, then you may also skip this section. It may only become relevant if you plan to work with the framework’s source code, e.g., if you seriously plan to develop your own QA system using the framework.
The source code of the QALL-ME Framework depends on the
Java EE 5 API. Therefore, to compile and use
the code you have to add the API to your classpath. The
relevant library is the javaee.jar file which is shipped
for example with Glassfish or with the Java EE 5 SDK. In your Glassfish installation you may find it in the lib subdirectory.
[3] There is also a non-free “pro” version; for our purposes the free version should absolutely suffice, though.


